SQL Server Express Installation
SQL Server Express is a free database developed and distributed by Microsoft. It is a fast and realiable solution for applications and websites, with more than enough requirements for most of uses. From all SQL Server versions, Express is a free edition of the database system. It is more thatn enough for the needs of your SMEs. In some occasions the installation of the software can be a little confusig. So, here is the step by step tutorial for the correct installation of the software.
SQL Sever Step by Step Installation
- Double click on SQLEXPRADV_x64_ENU o en SQLEXPRADV_x86_ENU according to the system you are using.

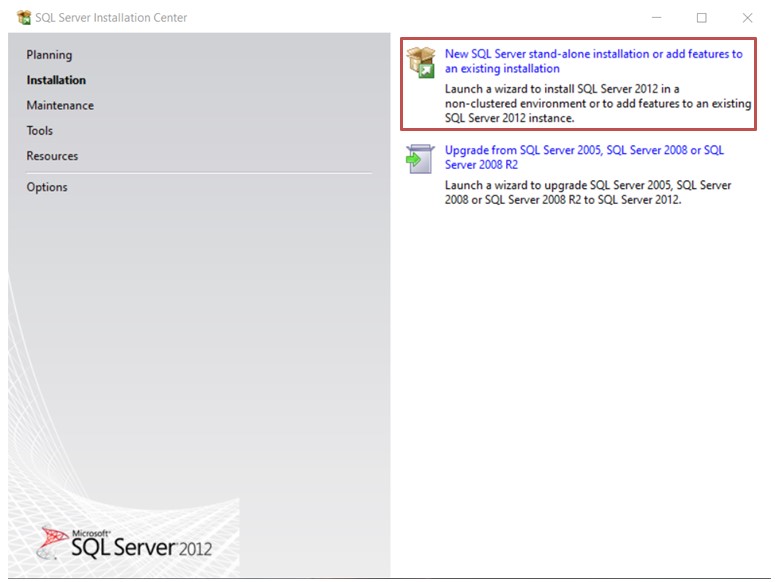
- In the Wizard main page, click on “New SQL Server stand-alone installation…”.
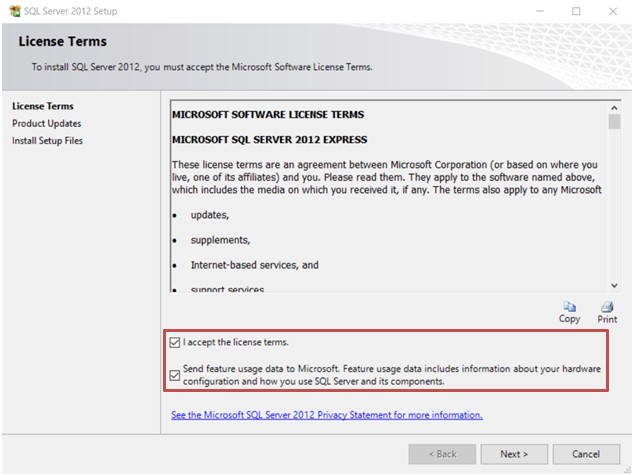
- In the License Terms window, click on the box to accept the license terms and you can choose to send your information to Microsoft. Then click “Next”.
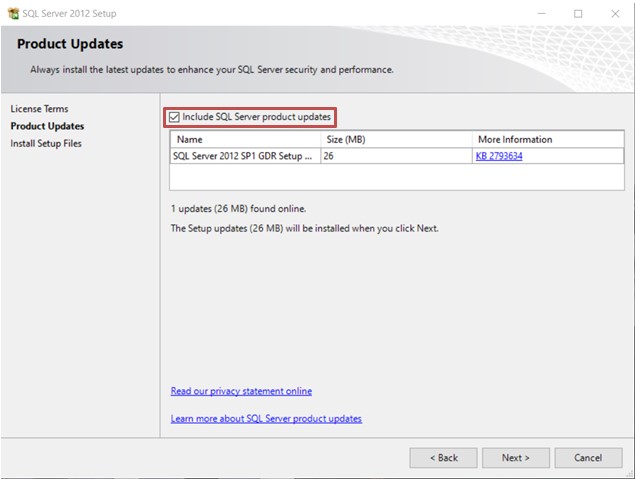
- In the Product Updates window, click on the box to automatically install the latest software updates, then click “Next”.
- In the next window wait until the updates are downloaded and when all of the Status are “Completed”, click “Install”.
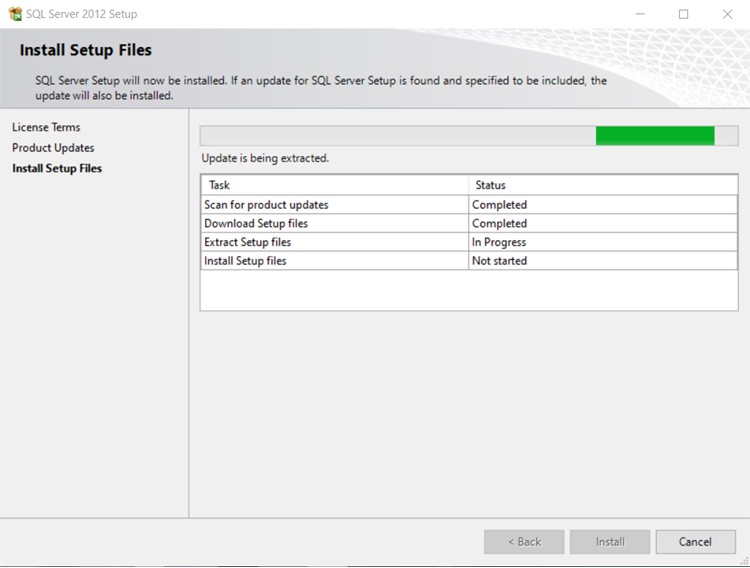
Note: From this moment the software might show the next screens during installation, just press “OK” or wait until the operation is completed:


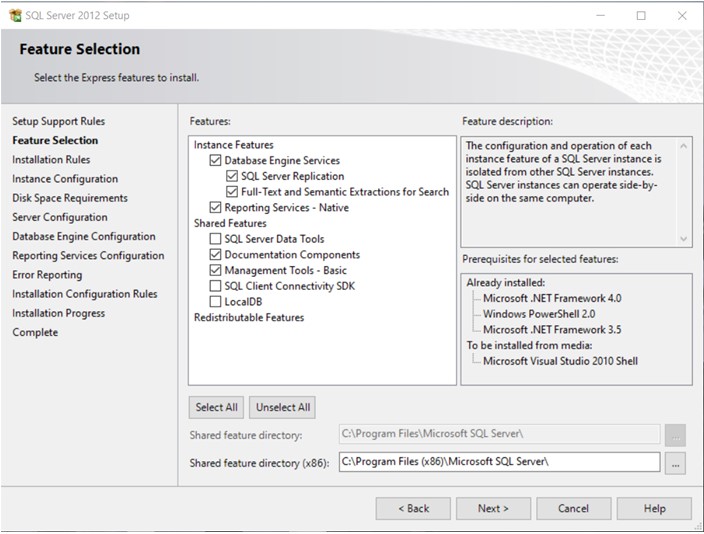
- In the Feature Selection window, click on the boxes as shown in the image an then click “Next”.
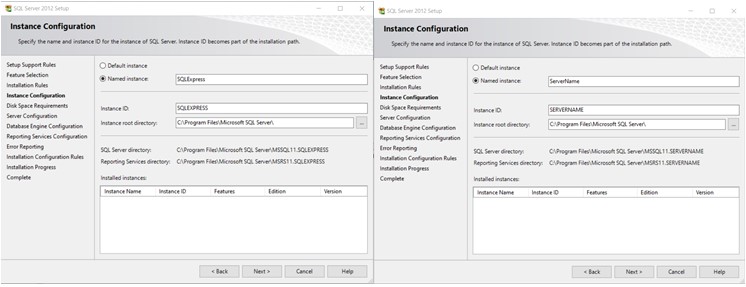
- On the next window you can either choose to keep the default instance name or create a custom one with the “Name Instance” option. Once you are ok with the instance name of your choice, click “Next”.
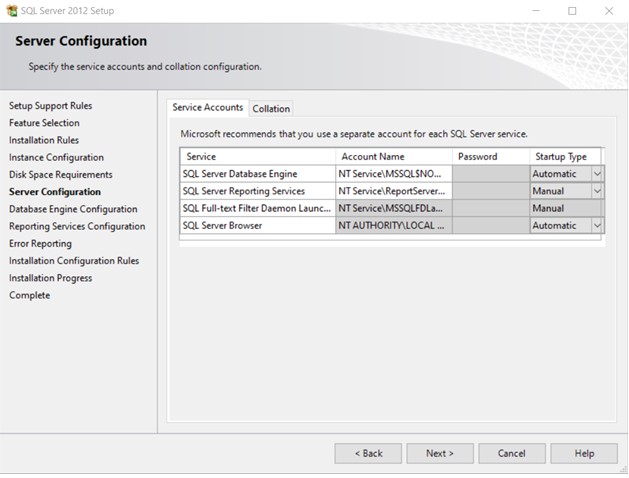
- In the Server Configuration window, choose Startup Type for each Service as shown in the image, then click “Next”.
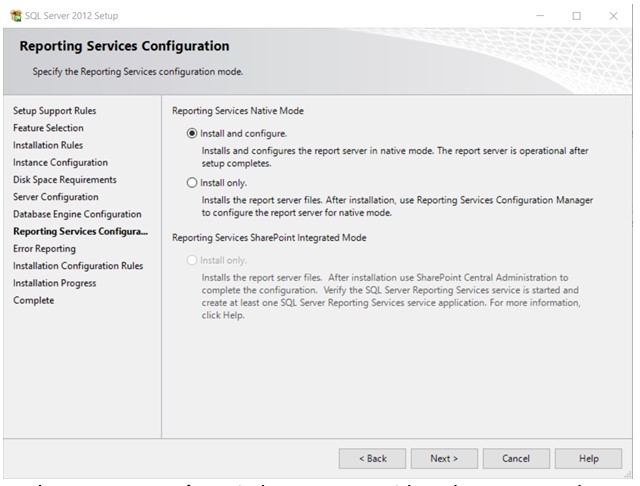
- In the Reporting Services Configuration window click on “Install and configure” and then click “Next”.
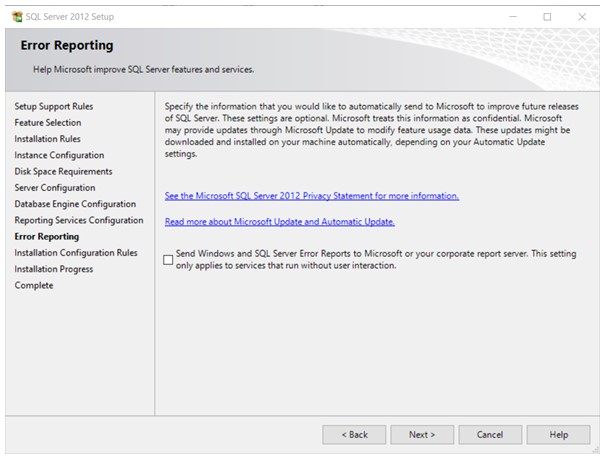
- In the Error Reporting window, you can either choose to send or not your reports to Microsoft to help on future software updtaes. Then click “Next”.
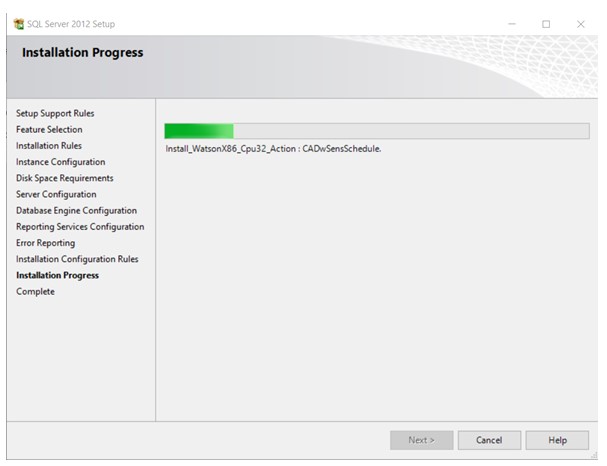
- On the Installation Progress window, wait until all the components finish their installation. It is adviced to be patient, as this process can take long time. Once the installation is finished click “Next”.
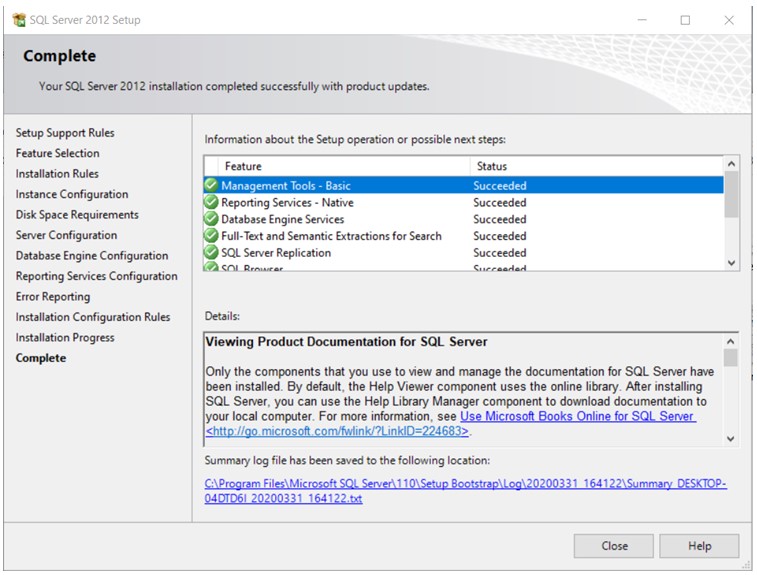
- On the Complete window, you will see all the installed components. Wih this the installation is complete. Click “Close”.
