Welcome to the Phantom Family
Take your first steps into the world of multi-parameter condition monitoring and learn how to install your Phantom System.
Welcome to the Phantom Family
Take your first steps into the world of multi-parameter condition monitoring and learn how to install your Phantom System.
- Choose your database type →
- SQLce
- MySQL & SQL Server
- EI Analytic
Choose a database format from the list to learn more and find out how to create databases.
Note: For this type of databases you will need EI Monitoring System. Click here to download.
SQLce is a type of compact database that allows you to store up to 3.5GB of information. This is the default type that DigivibeMX uses for saving your information. Once you have installed all of the content of the installation folder you can proceed with creating your database.
To create a new database follow the next steps:
- In DigivibeMX 11; access to the “Database” tab.
- Select the “New Database” button.

- Write a name for you database and click accept
- Click yes in the pop-up windows.
Now you are ready to create your machine tree in DigivibeMX 11. Just follow the steps in the next section.
↓
Choose a SQL format and select the video accordingly. Here you will find how to create a connection with DigivibeMX 11
Now you’re ready to create your machine tree in DigivibeMX 11. You just need to follow the steps in the following section.
Note: For this type of databases you will need EI Monitoring System. Click here to download.
↓
You can store your information in, the Erbessd Instruments cloud service, EI Analytic. Create a free account and receive 1GB storage for your data or purchase a full account and receive 10GB of storage.
To create an account just follow these steps:
- In your internet browser access to the address https://www.eianalytic.com/
- Find and click the “Login” button at the upper right corner of the screen.
- At the login page find and click the “New Account” option.
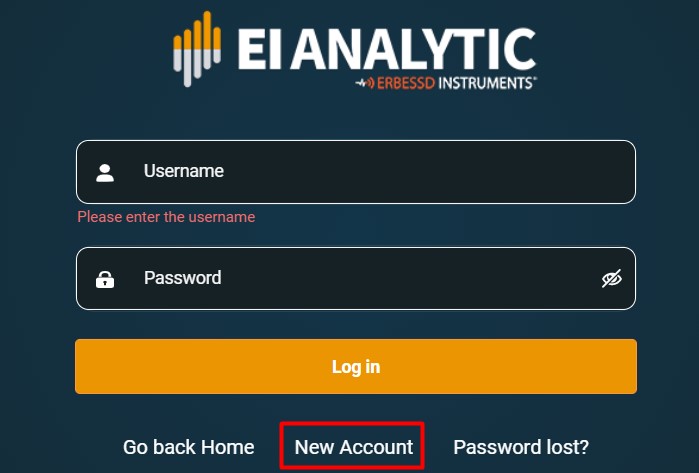
- Write your information and click “Create account”.
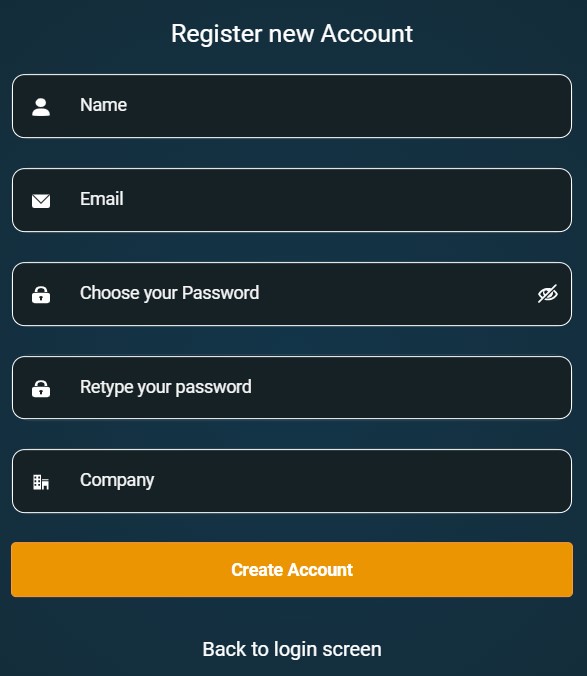
And now you have an EI Analytic account, you can create machines inside the platform or login into your account with DigivibeMX.
Just follow the steps in the next section.
↓
Click here and learn how to create your Machine Tree ↓
No matter what database format you are using. Creating machines follows the exact same process.
- Access to the “Database” tab and click the “Machine Manager” button.

- Here, click the “Add Machine” option.
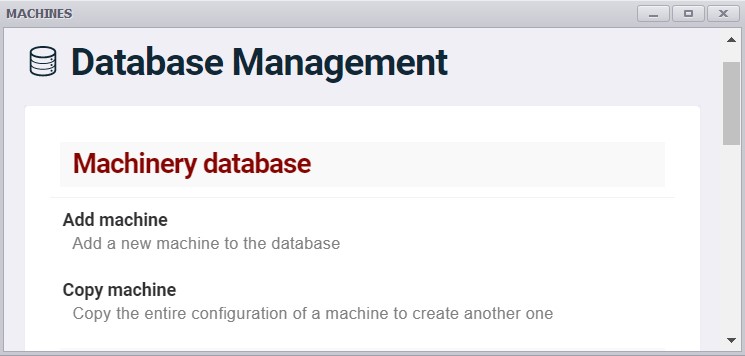
- Create your “Company”, “Area” and assign a name for your Machine.
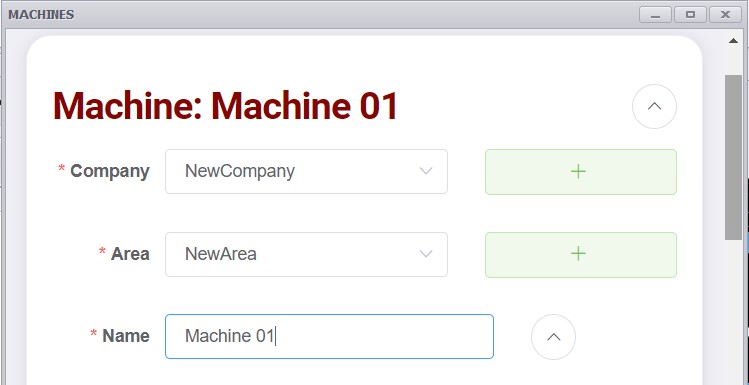
- Add points and give them a name. Once your done click “Save”.
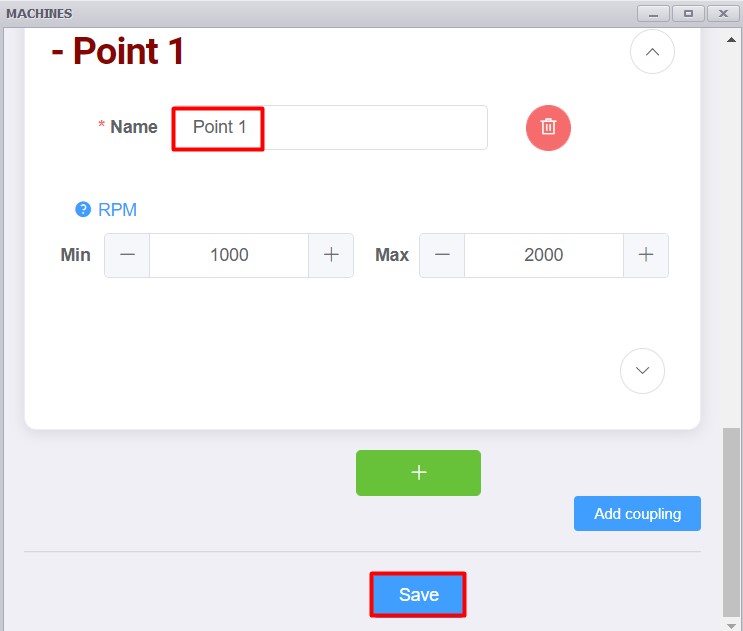
Now you’re ready to add Phantom sensors.
Choose a SQL format and select the video accordingly. Here you will find how to create a connection with DigivibeMX 11
Now you’re ready to create your machine tree in DigivibeMX 11. You just need to follow the steps in the following section.
Note: For this type of databases you will need EI Monitoring System. Click here to download.
↓
- Choose your Phantom 🡆
- Vibration Phantom
- Infrared Phantom
- Thermocouple Phantom
- Current Phantom
- RPM Phantom
- General Purpose Phantom
Choose a Phantom from the list to learn more and find out how to install your Phantom System
DIGIVIBE SET UP

Add Phantom
Manually
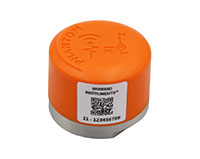
It is possible to add a phantom device by entering the sensor code. Select the Manually button. The code window will open, enter the phantom 11-ID phantom code from the sensor QR tag (2-digit sensor model code + 9-digit sensor serial number) and select Ok. The sensor will appear in the added phantom’s section.
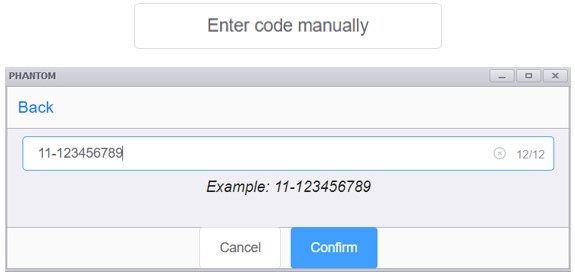
Scanning the QR code
(Requires a tablet, laptop or PC camera):
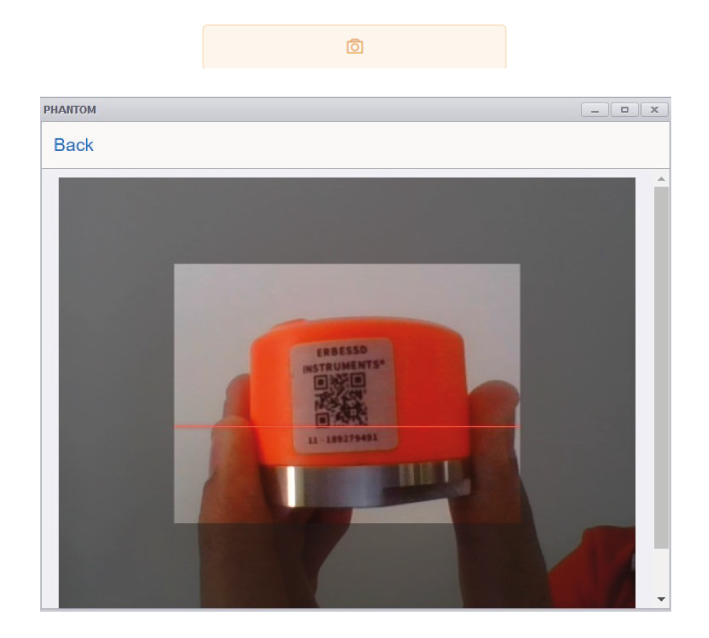
Select the scan code button: Choose the camera from the list, position the QR label in front of the camera – place it centered and close so that it is easy to read. The code will be captured automatically and the scan window will close. The Phantom will have been added.
Configure and name.
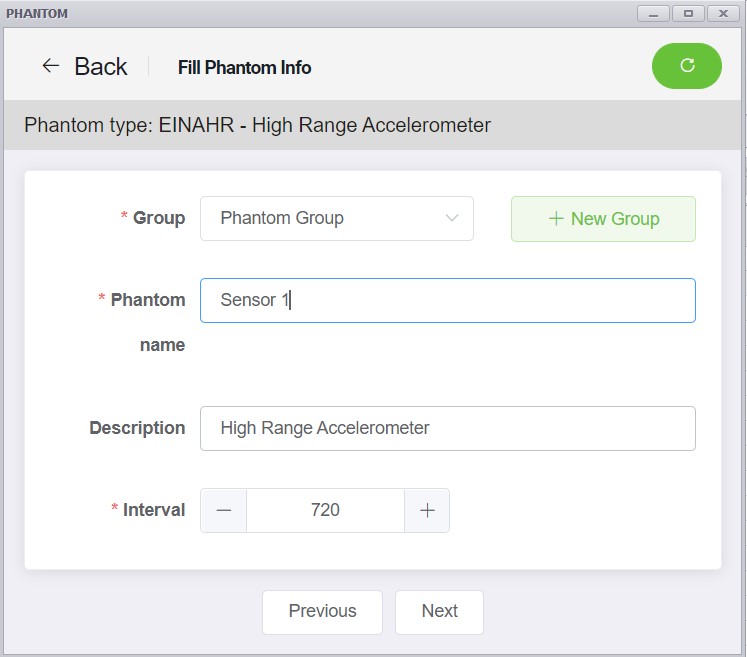
We can organize our devices with the following tools:
- In group we can add the phantom to a previously created group or create a new group.
- In name we can name our device to simplify its identification.
- In description we choose the type of sensor we are using.
- Finally, the Data Send Interval sets the sensor collection interval. The minimum value for data collection is 10 minutes and the maximum is 1,440 minutes (1 day), with the exception of the ATEX-certified Phantom, where the minimum is 1440 minutes.
When finished, select next.
Asigne device
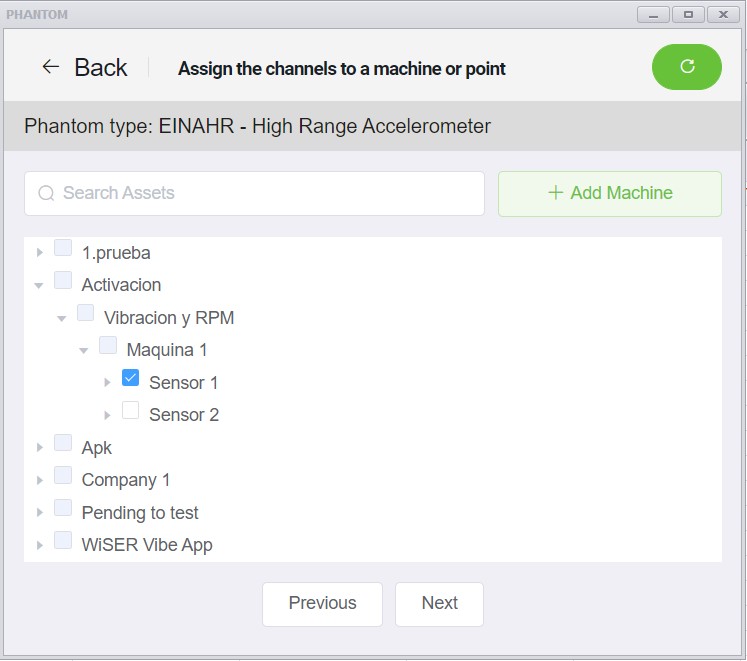
In the channel assignment window, we can select an analysis point on a machine where to add our phantom device, we can only add one sensor to one point:
Alarm and channel configuration
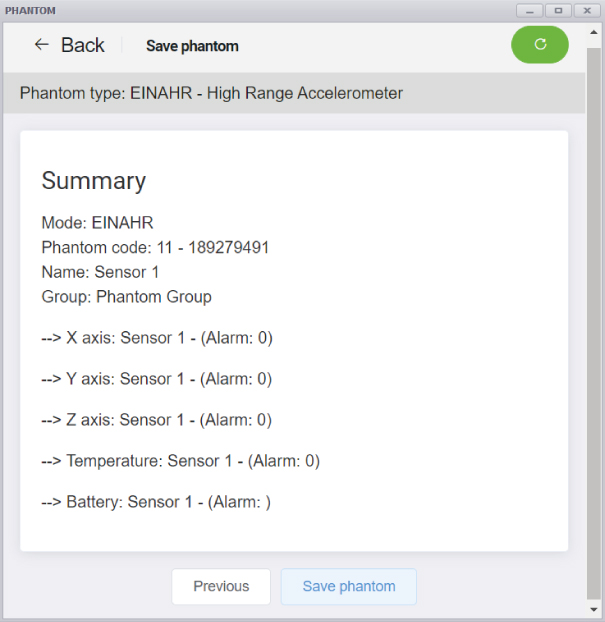
In the next window, we have two sections, “axis configuration” and “alarms”.
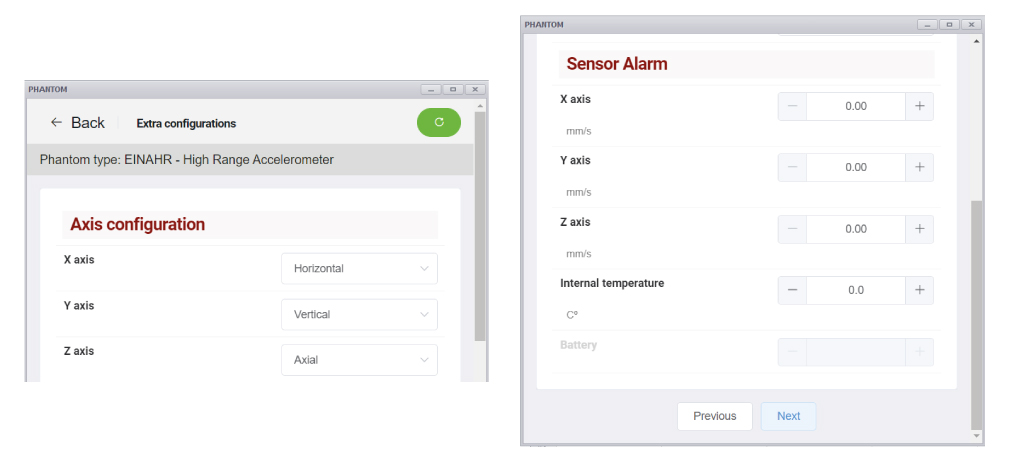
- In Axis configuration,we choose a value for each axis of the phantom sensor, we can select horizontal, vertical and axial from the list.
- In alarms we can set a preset RMS and temperature threshold. If the alarm value is exceeded, the sensor will wake up immediately and make an unscheduled measurement.
Completing the configuration
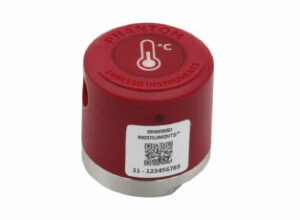
SETUP IN DIGIVIBEMX

The Phantom Configuration Wizard screen will open in a new window. In this window you will see several options. Click on “Add Phantom”.
Add Phantom
Manually
It is possible to add a phantom device by entering the sensor code. Select the button manually. The code window will open, enter the phantom 20-ID phantom code from the sensor QR tag (2-digit sensor model code + 9-digit sensor serial number) and select Ok. The sensor will appear in the added phantom’s section..

Scaning the QR code
(Requires a camera on a tablet, laptop or PC): Select the scan code button: Choose the camera from the list, position the QR label in front of the camera – place it centered and close so that it is easy to read. The code will be captured automatically and the scan window will close. The Phantom will have been added.

Setup and name
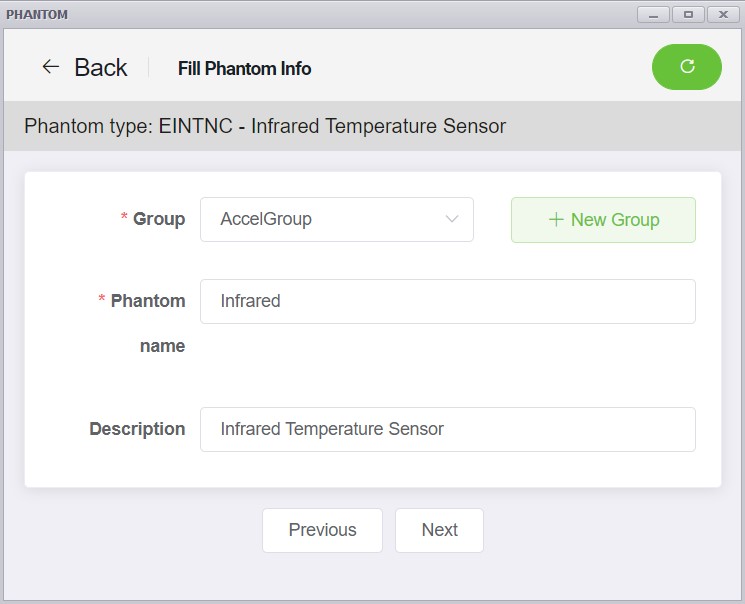
We can organize our devices with the following tools:
- In group we can add the phantom to a previously created group or create a new group.
- In name we can name our device to simplify its identification.
- In description we choose the type of sensor we are using.
When finished, click next.
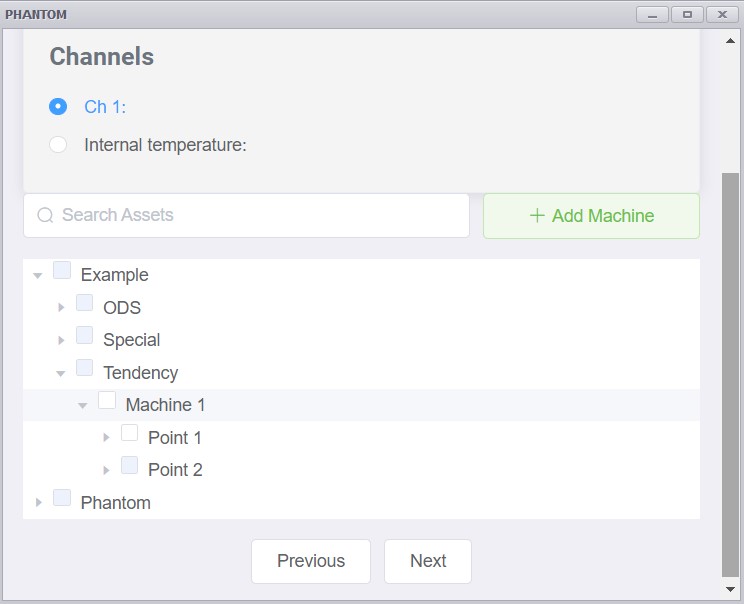
Asign device
In the channel assignment window, we can select an analysis point on a machine where to add our phantom device, we can only add one sensor to one point or machine:
Alarm and channel configuration
In the next window, we have the “alarms” section.
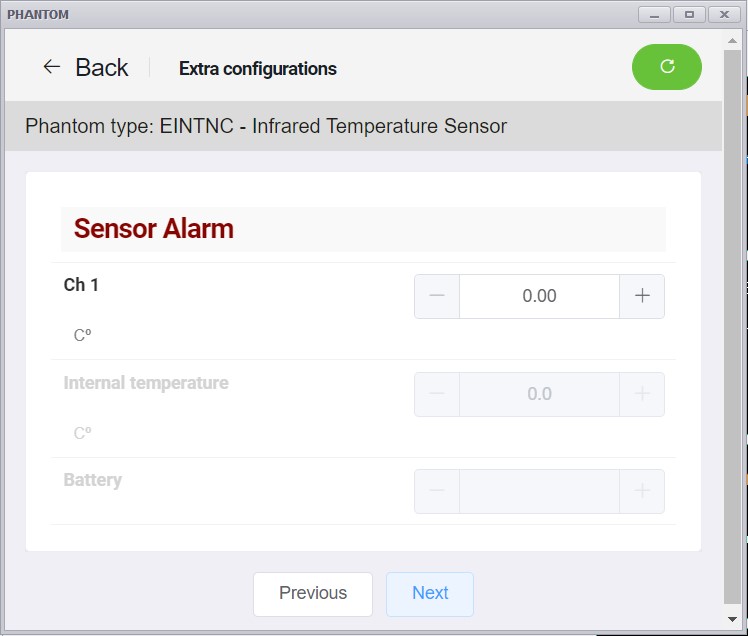
- In alarms we can set a preset temperature threshold. If the alarm value is exceeded, the sensor will wake up immediately and make an unscheduled measurement.
Final Setup
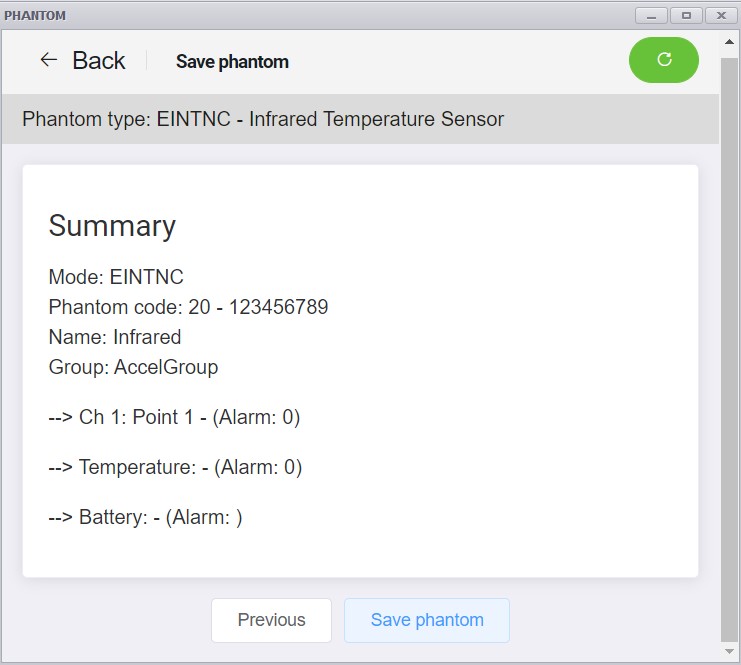
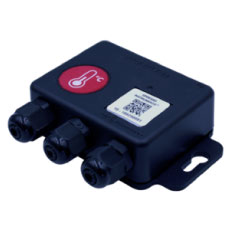
DIGIVIBEMX SETUP

The Phantom Configuration Wizard screen will open in a new window. In this window you will see several options. Click on “Add Phantom”.
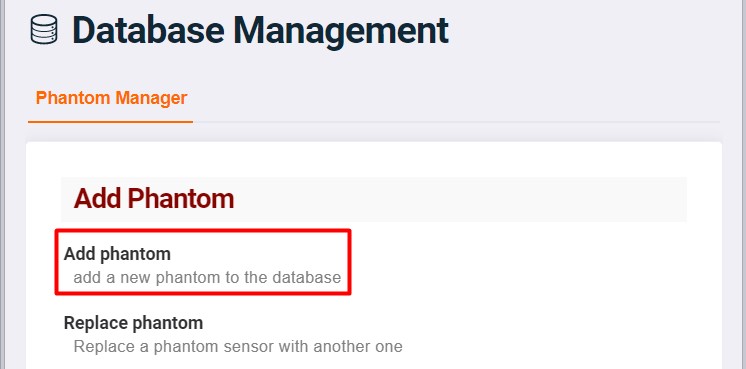
Add Phantom
Manually
It is possible to add a phantom device by entering the sensor code. Select the button manually. The code window will open, enter the phantom 11-ID phantom code from the sensor QR tag (2-digit sensor model code + 9-digit sensor serial number) and select Ok. The sensor will appear in the added phantom’s section.

Scaning the QR code
(Require a camera in a tablet, laptop or PC): Select the scan code button: Choose the camera from the list, position the QR label in front of the camera – place it centered and close so that it is easy to read. The code will be captured automatically and the scan window will close. The Phantom will have been added.

Configuration and name
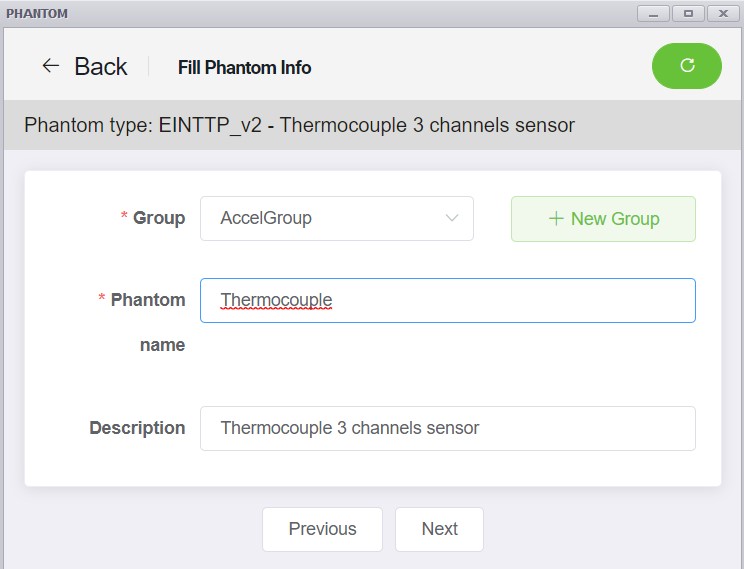
We can organize our devices with the following tools:
- In group we can add the phantom to a previously created group or create a new group.
- In name we can name our device to simplify its identification.
- In description we choose the type of sensor we are using.
When finished, select next.
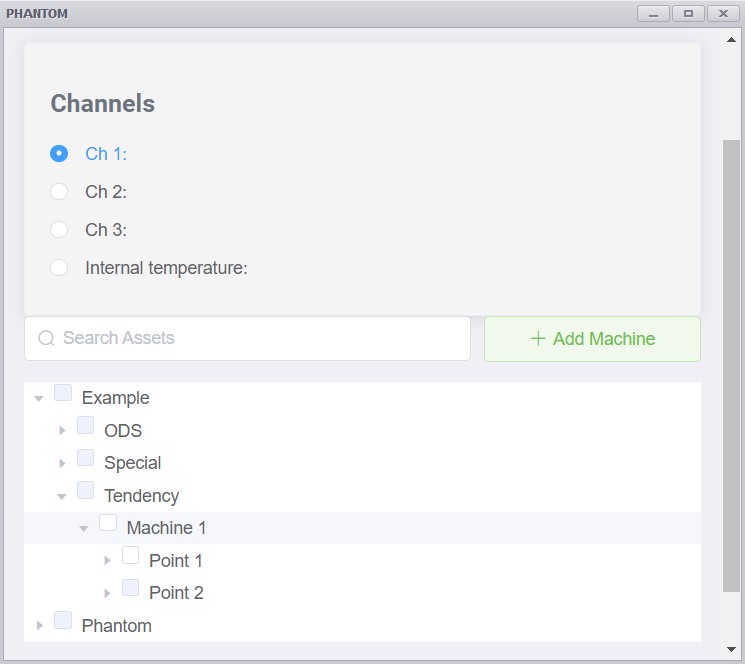
Assign device
In the channel assignment window, we can select an analysis point on a machine where to add our phantom device, we can only add one sensor to one point or machine:
Alarm and channels setup
In the next window, we have the “alarms” section.
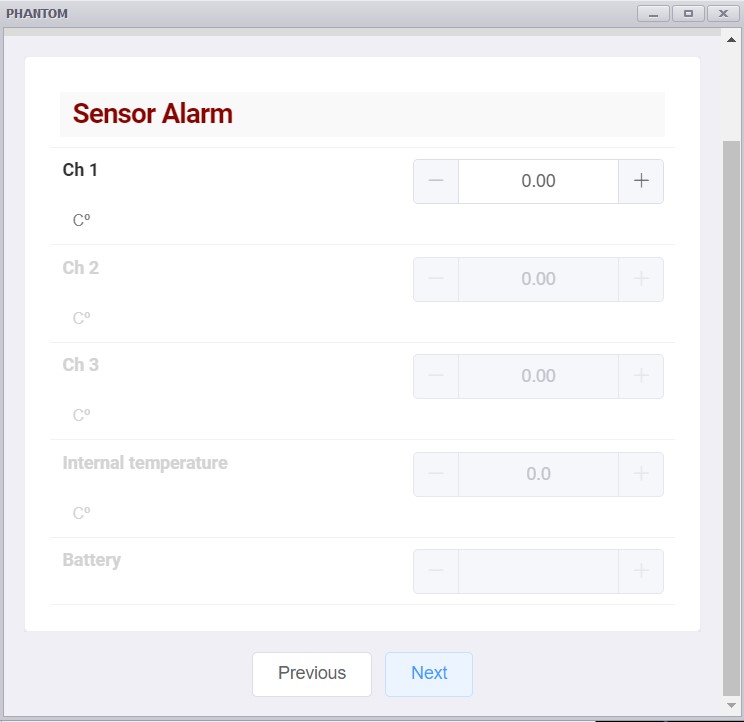
- In alarms we can set a preset temperature threshold. If the alarm value is exceeded, the sensor will wake up immediately and make an unscheduled measurement.
Finishing the Setup
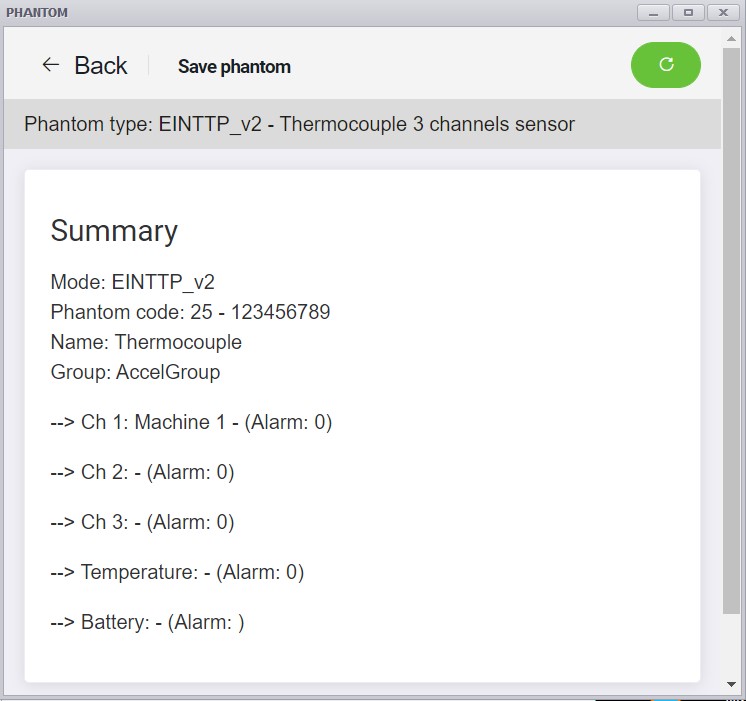
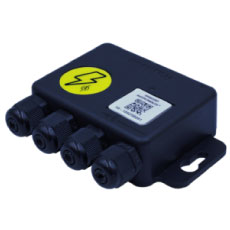
DIGIVIBEMX SETUP

The Phantom Configuration Wizard screen will open in a new window. In this window you will see several options. Click on “Add Phantom“.

Add Phantom
Manually
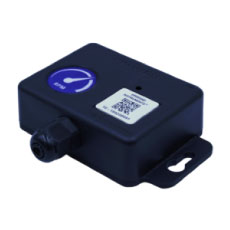
It is possible to add a phantom device by entering the sensor code. Select the button manually. The code window will open, enter the phantom 30-ID phantom code from the sensor QR tag (2-digit sensor model code + 9-digit sensor serial number) and select Ok. The sensor will appear in the added phantom’s section.

Scaning the QR code
(Require a camera in a tablet, laptop or PC): Select the scan code button: Choose the camera from the list, position the QR label in front of the camera – place it centered and close so that it is easy to read. The code will be captured automatically and the scan window will close. The Phantom will have been added.

Name and Configure
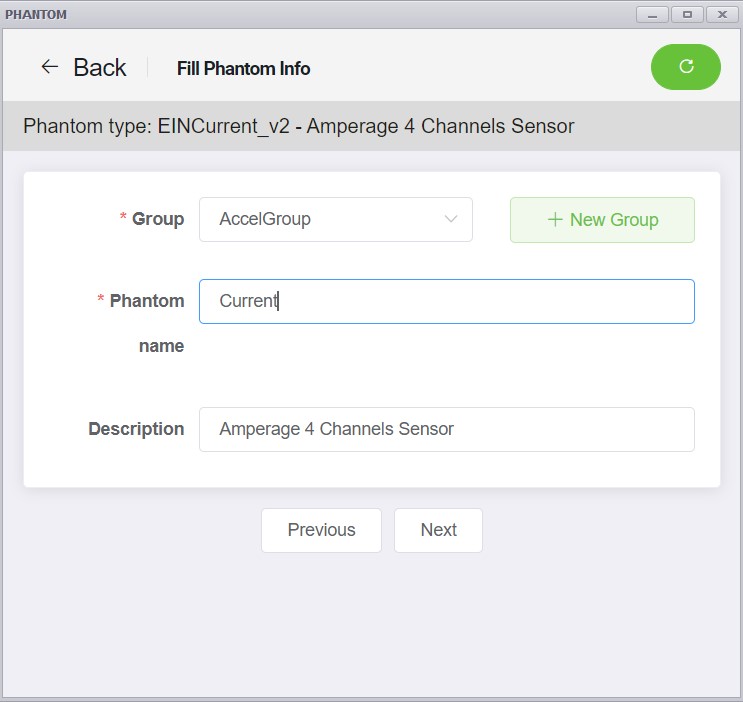
We can organize our devices with the following tools:
- In group we can add the phantom to a previously created group or create a new group.
- In name we can name our device to simplify its identification.
- In description we choose the type of sensor we are using.
When finished, select next.
Assign a device
In the channel assignment window, we can select an analysis point on a machine where to add our phantom device, we can only add one sensor to a point or machine:
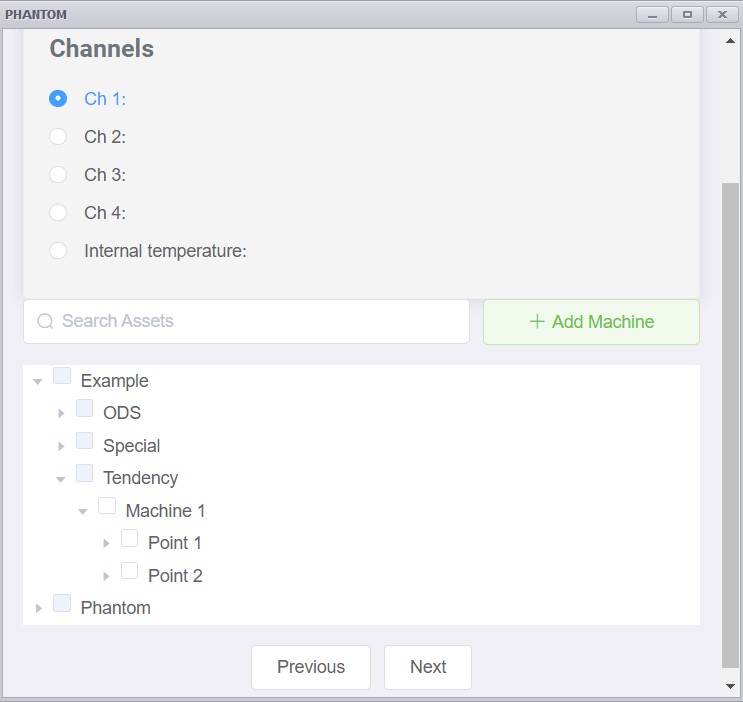
Alarms and Channels Setup
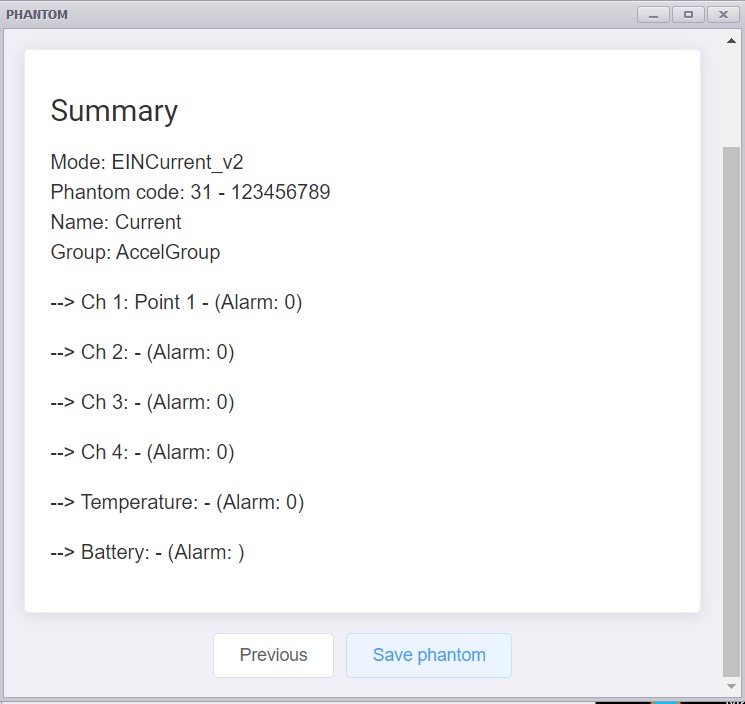
Next, we have the Phantom alarm configuration window, we select which type of clamp will be connected to each channel for the Phantom, we have available clamps of 50, 100, 250 and 500 Amp.
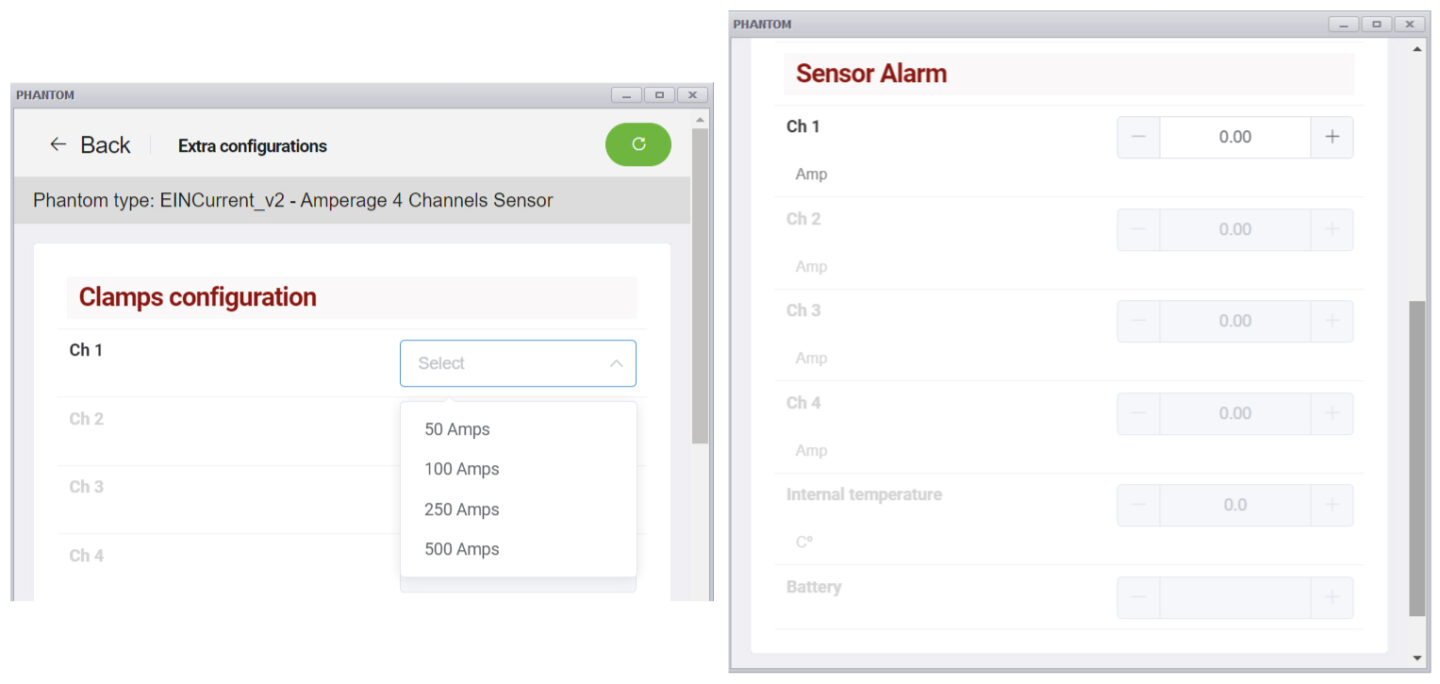
In addition, here we can set a preset current threshold. If the alarm value is exceeded, the sensor will wake up immediately and send an unscheduled data capture.
Finishing the setup
DIGIVIBEMX CONFIGURATION


Add Phantom
Manually
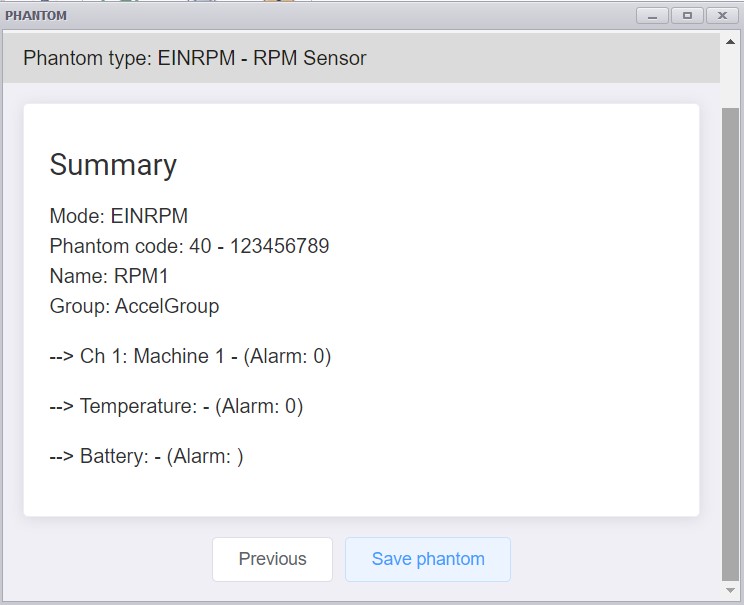
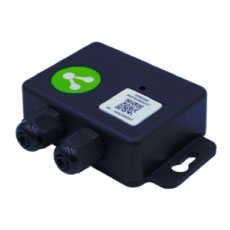
It is possible to add a phantom device by entering the sensor code. Select the button manually. The code window will open, enter the phantom 40-ID phantom code from the sensor QR tag (2-digit sensor model code + 9-digit sensor serial number) and select Ok. The sensor will appear in the added phantom’s section.

Scanning the QR code
(Require a camera with a tablet, laptop o PC): Select the scan code button: Choose the camera from the list, position the QR label in front of the camera – place it centered and close so that it is easy to read. The code will be captured automatically and the scan window will close. The Phantom will have been added.

Name and Configure
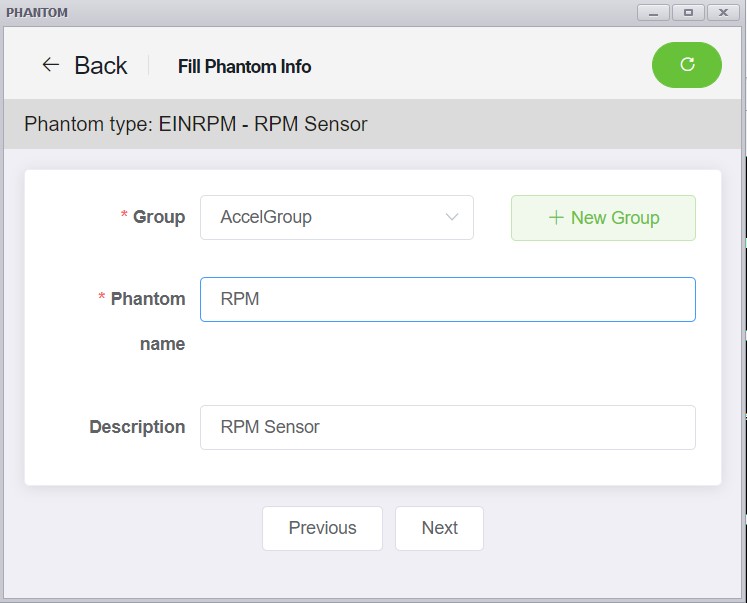
- In group we can add the phantom to a previously created group or create a new group.
- In name we can name our device to simplify its identification.
- In description we choose the type of sensor we are using.
When finished, click next.
Assign a device
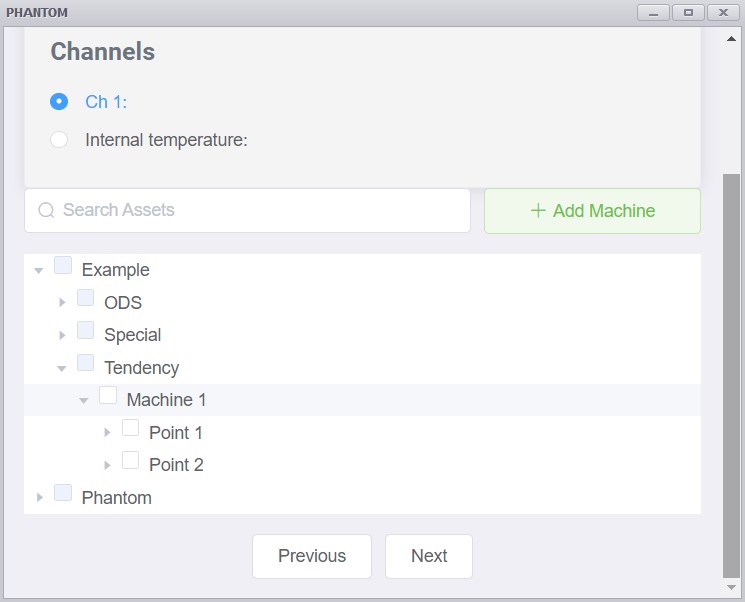
In the channel assignment window, we can select an analysis point on a machine where to add our phantom device, we can add the RPM phantom to a single analysis point or machine.
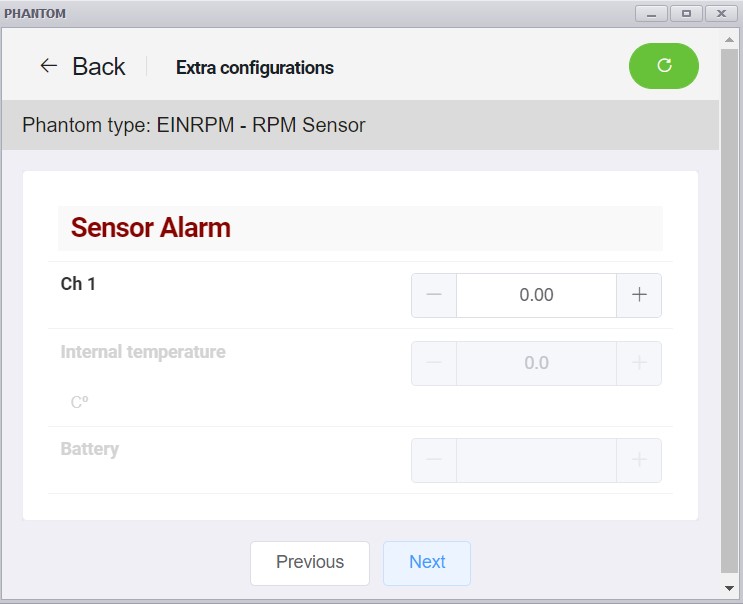
Set the Alarm
In the next window, we can set a preset threshold of the internal temperature.
Completing the setup
DIGIVIBEMX SETUP

The Phantom Configuration Wizard screen will open in a new window. In this window you will see several options. Click on “Add Phantom”.

Add Phantom
Manually
It is possible to add a phantom device by entering the sensor code. Select the button manually. The code window will open, enter the phantom 60-ID phantom code from the sensor QR tag (2-digit sensor model code + 9-digit sensor serial number) and select Ok. The sensor will appear in the added phantom’s section.

Scanning the QR code
(Requires a camera in a tablet, laptop o PC): Select the scan code button: Choose the camera from the list, position the QR label in front of the camera – place it centered and close so that it is easy to read. The code will be captured automatically and the scan window will close. The Phantom will have been added.

Name and Configure
The phantom configuration window allows us to organize our sensors for easy identification. Example:
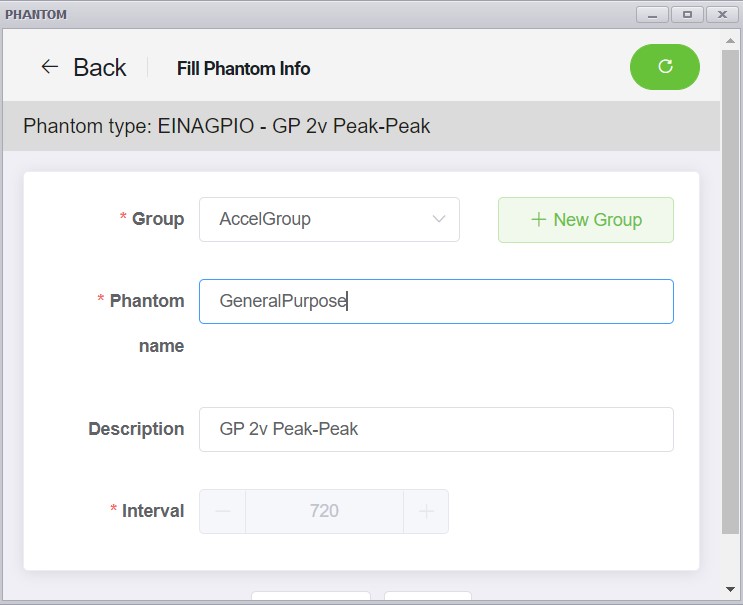
- In group we can add the phantom to a previously created group or create a new group.
- In name we can name our device to simplify its identification.
- In description we choose the type of sensor we are using.
When finished, click next.
Assign a device
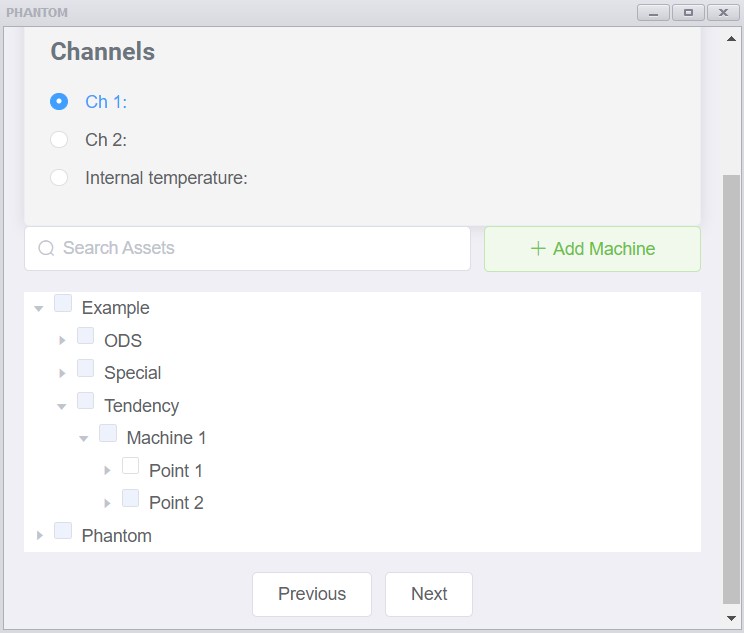
In the channel assignment window, we can select an analysis point on a machine where to add our phantom device, we can add the module to a single analysis point, or we can add the module to a single analysis point..
Setup units and alarms
Next is the unit configuration window. Here you will have to define the type and a sensor name. Afterwards, you will have to create your unit according to the sensor connected to the general purpose module.
When creating the unit, define the range of your unit based on the general purpose module (4-20mA and 0-10V).
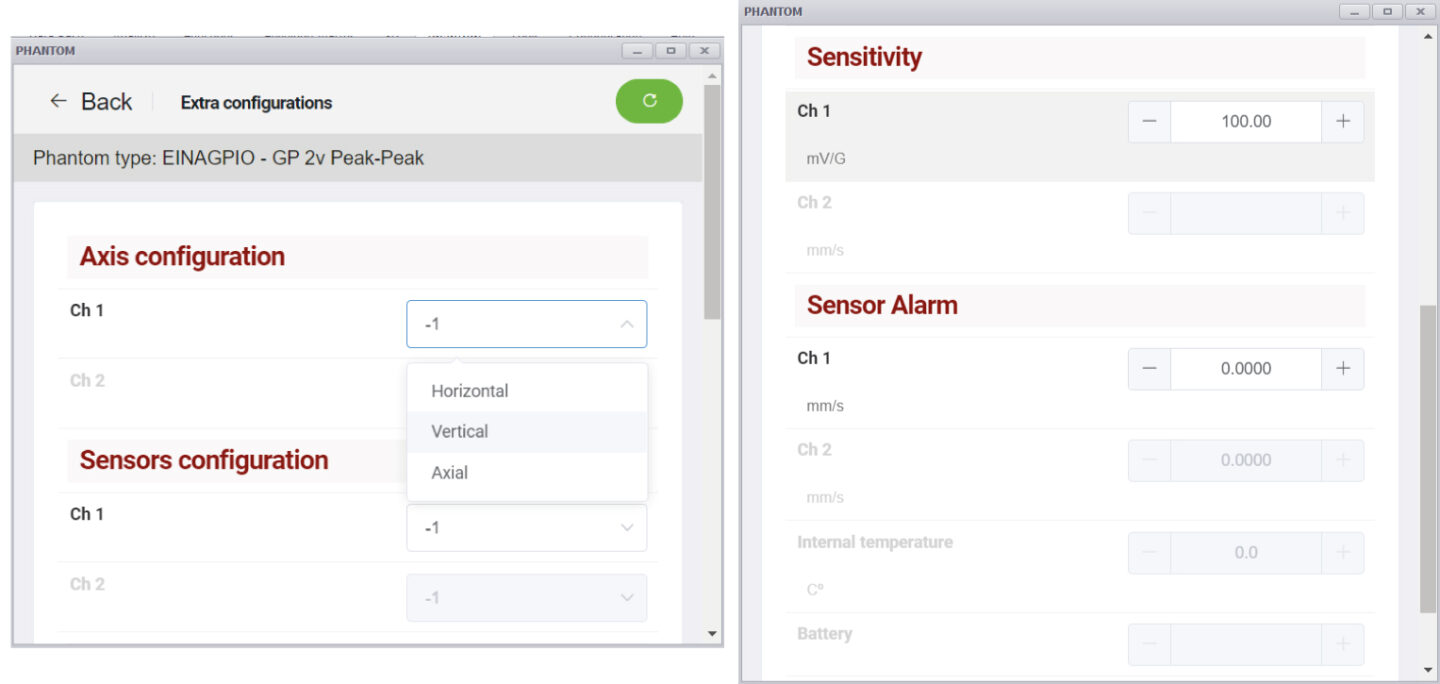
In addition, here we can set a preset current threshold. If the alarm value is exceeded, the sensor will wake up immediately and send an unscheduled data collection.
Finishing the setup
- Choose your Phantom type 🡆
- Phantom Sensors
- Phantom Modules
Choose a Phantom from the list to learn more and find out how to install your Phantom System
To achieve the correct vibration analysis it is crucial to know how the sensor is placed in the machine. The vibration sensor contains a triaxial accelerometer that measures vibration in three axes at the same time. The sensor also has an engraving on its front face that indicates the position of these axes. It is important to define the position of the sensor before its configuration in DigivibeMX®.
The image below shows a Vibration Phantom Sensor placed in a three-phase motor. We can also see that the Z axis is parallel to the motor shaft; the Y axis corresponds to the vertical axis, and the X axis is orthogonal to the other two and corresponds to the horizontal axis of the motor. This means that in DigivibeMX® we should use the following configuration: H for the X axis, V for the Y axis and A for the Z axis.
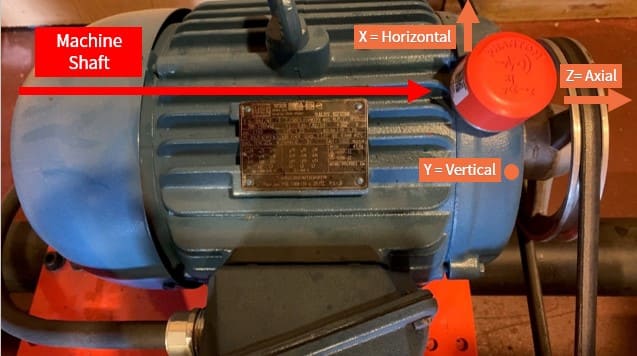
Another possible configuration would be to place the sensor in a plane transverse to the machine shaft. For this configuration the values to be used should be as follows: H for the Y-axis, V for the X-axis and A for the Z-axis.

- Set up your Gateway 2.0 and start collecting data!
Set up your Gateway 2.0 using EI Monitoring
Set up your Gateway 2.0 using EI Analytic
Change all of your vibration sensors’ settings at the same time
Use a specific setting for your Phantom sensors

